
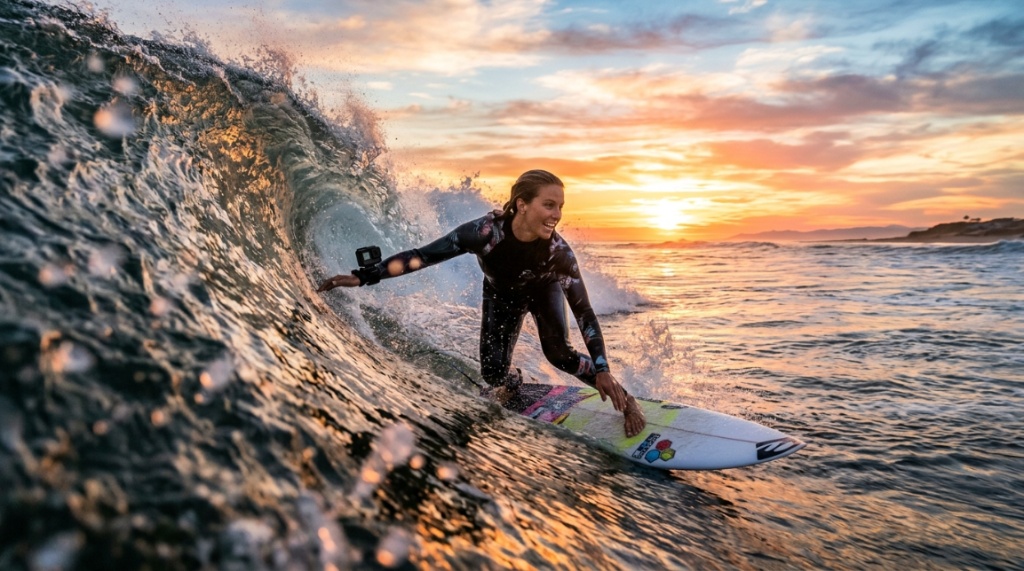
You’ve paddled out on a glassy morning, caught the wave of the day, and immediately thought, “I wish I had that on film.” Capturing surfing footage is one of the most rewarding ways to relive the stoke, but it’s also one of the most demanding environments for consumer electronics. Saltwater, sand, impact, and constant motion will punish a poorly chosen camera. The good news is that you don’t need a Hollywood budget to get crisp, stable footage. You just need to know exactly what to look for before you hand over your cash. This guide breaks down the essential specs, the common mistakes, and the practical trade-offs so you can choose the best waterproof action camera for surfing without wasting money on features you’ll never use.
What Makes an Action Camera Suitable for Surfing?
Surfing is not the same as mountain biking or skiing. You are dealing with a corrosive saltwater environment, constant vibration from wave energy, and the very real possibility that your camera will be knocked off your head or board. A camera that works fine on a hiking trail might fail within a month of regular surf use.
The core requirements boil down to four things: native waterproofing, image stabilization, mounting security, and battery life. Let’s look at each one in detail so you understand why they matter and how they affect your buying decision.
Native Waterproofing vs. External Housings
You will see two types of waterproofing in action cameras: native and housing-based. Native waterproofing means the camera body itself is sealed and can be submerged without any extra case. Most modern action cameras are rated for depths of 10 meters (33 feet) or more without a housing. This is ideal for surfing because you don’t have to fiddle with a bulky case before every session.
However, there is a catch. A waterproof housing offers more than just depth rating. It provides a physical barrier against sand, which is arguably more destructive to cameras than water. Sand gets into buttons, scratches lenses, and jams hinges. If you surf in sandy beach breaks, a housing adds a layer of protection that native waterproofing simply cannot match. The trade-off is that housings add bulk and can cause audio to sound muffled.
For most surfers, a camera with native waterproofing is sufficient, but you should always rinse your camera in fresh water after every session to remove salt crystals and sand particles.
Image Stabilization: The Difference Between Watchable and Nauseating
Wave motion is chaotic. Your head moves up and down, side to side, and rotates slightly with every paddle stroke and turn. Without stabilization, your footage will look like a shaky home video from the 1990s. This is the single most important feature for surf footage quality.
Look for cameras with advanced electronic or sensor-shift stabilization. The current industry standard is HyperSmooth (GoPro) or RockSteady (DJI). These systems use gyroscopes and software algorithms to smooth out high-frequency vibrations and larger movements. A camera with only basic digital stabilization will struggle with the constant, rhythmic motion of paddling and the sudden jerks of a bottom turn.
If you are on a tight budget, you can still get decent results with a camera that has good stabilization, but you must be realistic. Budget cameras often cut off parts of the image to stabilize the footage, resulting in a narrower field of view. This is a trade-off you need to accept if you are not spending top dollar.
Key Specifications to Compare Before Buying
Once you understand the environmental demands, you can start comparing specific technical specifications. Do not get lost in marketing jargon. Focus on the specs that actually impact your footage and your ability to use the camera in the water.
Field of View and Lens Distortion
The field of view (FOV) determines how much of the scene you capture. A wider FOV (like SuperView or Ultra Wide) is great for capturing the wave in front of you and the surfboard beneath you. However, wider lenses introduce distortion, making straight lines look curved. This is especially noticeable when you are riding a wave and the horizon looks like a bowl.
For surfing, a medium to wide FOV is usually the sweet spot. It captures enough of the action without making the footage look unnatural. Some cameras allow you to adjust the FOV digitally, but this crops into the sensor, reducing resolution. Think about what you want the footage to look like. If you want a cinematic feel, a narrower FOV with less distortion is better. If you want to document the full experience, go wide.
Frame Rates and Resolution
You do not need 8K resolution for surfing. In fact, 4K at 60 frames per second (fps) is the practical sweet spot. The 60 fps allows you to slow the footage down to half speed for dramatic slow-motion shots of a barrel or a spray-filled cutback. If you shoot at 30 fps, slow motion will look choppy.
Higher resolutions like 5.3K or 8K are useful if you plan to crop heavily in post-production, but they consume massive amounts of storage and battery life. For most surfers, 4K/60 is more than enough. If you are buying a budget camera, ensure it can actually sustain 4K/30 without overheating. Some cheaper models overheat after ten minutes of continuous recording, which is useless for a long surf session.
Battery Life and Swappable Batteries
Surf sessions can last two hours or more. Cold water drains batteries faster than warm air. A camera that dies after 40 minutes of recording is a frustration you want to avoid. Look for cameras with swappable batteries so you can carry a spare in your beach bag or wetsuit pocket.
Also, consider the charging method. Some cameras use proprietary cables, while others use USB-C. USB-C is more convenient because you can charge from a portable power bank between sessions. Avoid cameras with built-in, non-removable batteries unless you are certain the battery life exceeds your typical session length, Before heading out to catch waves with your new gear, make sure you check out these 10 Surfing Hacks Every Beginner Should Know to boost your confidence in the water.
Mounting Options: Where Will You Put the Camera?
The best camera in the world is useless if you cannot attach it securely. Surfing offers several mounting positions, each with its own pros and cons. Your choice will influence which accessories you need to buy.
Mouth Mounts
Mouth mounts are popular because they give a low, stable perspective that is close to the water. You bite down on a molded mouthpiece, and the camera sits in front of your face. This is great for capturing the front of your board and the wave face. However, it can be tiring to hold for long periods, and it makes breathing harder when you are paddling hard. It also captures a lot of splashing and water noise.
Helmet or Head Mounts
Head straps or helmet mounts give you a higher perspective that follows your head movements naturally. This is the easiest way to film without thinking about it. The downside is that the footage can be shakier than a mouth mount because your head moves more than your jaw. You also need to ensure the strap is tight enough to stay in place during a wipeout.
Board Mounts
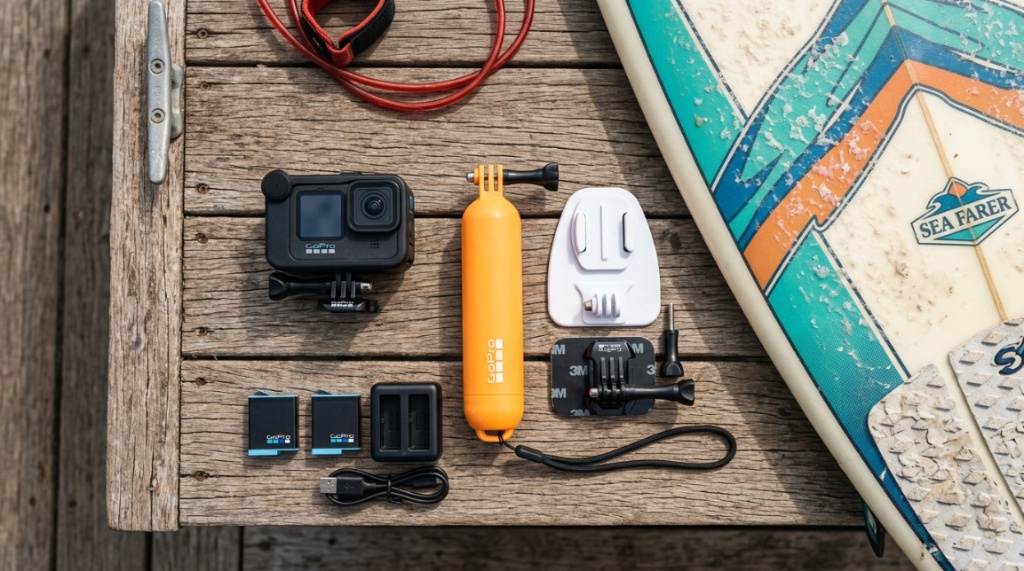
Board mounts attach the camera to the nose or tail of your surfboard using adhesive pads. This gives a unique, static perspective that shows the board flexing and the water rushing past. It is excellent for capturing the shape of the wave and your rail work. The downside is that you cannot adjust the angle while riding, and you risk damaging your board if the mount fails. You also need to use a leash or tether to prevent losing the camera if the mount breaks.
For beginners, a head strap is the easiest to manage. For more experienced surfers who want a specific aesthetic, a mouth mount or board mount is worth the extra effort.
Common Mistakes Surfers Make When Buying a Camera
Many surfers buy a camera based on specs alone and then regret it after the first session. Here are the most common pitfalls to avoid.
Ignoring the Touchscreen Interface
When you are in the water, you cannot use a touchscreen easily. Your fingers are wet, and the screen is covered in water droplets. Look for a camera with physical buttons that are easy to press with gloves or wet hands. Some cameras allow you to set up the shot on land and then just press a single button to start recording in the water. This is a feature you will appreciate immediately.
Forgetting About Audio Quality
Surf footage often sounds terrible. The wind noise and water splashing drown out everything else. While you cannot eliminate this entirely, some cameras have better wind-noise reduction algorithms than others. If you want to capture the sound of the wave crashing or your friends cheering, look for a camera with a good built-in microphone or the ability to connect an external mic (though this is rare in waterproof bodies).
Overlooking the Lens Cover
Some action cameras have removable lens covers, while others have a fixed lens. In a surf environment, the lens will get scratched eventually. If the lens is fixed, a scratch means the camera is ruined. If the lens cover is replaceable, you can swap it out for a few dollars. This is a critical consideration for long-term durability. Check if the camera you are considering has a replaceable lens cover or a protective glass layer.
How to Match the Camera to Your Skill Level and Budget
Not every surfer needs the flagship model. Your choice should depend on how often you surf, what you plan to do with the footage, and how much you are willing to spend.
Budget Cameras: Are They Worth It?
Budget cameras (under $150) have improved significantly. They can shoot decent 4K footage and have acceptable stabilization. However, they often struggle in low-light conditions (like dawn patrol) and their color science is less accurate. If you are just starting out and want to document your progress without a big investment, a budget camera is fine. Just be prepared for footage that looks slightly less polished than what you see from professional surf filmmakers.
Mid-Range Cameras: The Sweet Spot
Mid-range cameras (between $200 and $350) offer the best balance of features and price. They typically have excellent stabilization, good low-light performance, and reliable battery life. This is the category most recreational surfers should consider. You get the features that matter without paying for niche capabilities like 360-degree capture or extreme slow motion.
Flagship Cameras: For Serious Filmmakers
Flagship models (over $400) offer the best image quality, the most advanced stabilization, and the most robust build quality. They also have better dynamic range, which means they can capture detail in both the bright sky and the dark water simultaneously. If you are creating content for a channel or a brand, this is the level you need. For everyone else, the extra cost is hard to justify.
Frequently Asked Questions
Do I need a waterproof housing if the camera is already waterproof?
No, you do not need a housing for depth protection if your camera is rated for at least 10 meters. However, a housing provides extra protection against sand and impact. If you surf in sandy, rough conditions, a housing can extend the life of your camera significantly.
What is the best mounting position for surf footage?
The best position depends on the look you want. Mouth mounts give a low, immersive perspective. Head mounts are the easiest to use and follow your gaze naturally. Board mounts provide a unique static view of the board and wave. For beginners, a head mount is the most practical starting point.
Can I use a regular action camera for surfing?
You can, but you must ensure it has native waterproofing or a suitable housing. A camera without waterproofing will be damaged immediately. Additionally, you need a camera with good image stabilization to handle the constant motion of the water.
How do I maintain my camera after a surf session?
Rinse your camera and mounts in fresh water immediately after every session. Pay special attention to the buttons, charging port, and lens. Let it air dry completely before charging or storing it. This simple routine prevents salt corrosion and sand damage.
Is 4K resolution necessary for surfing videos?
No, but it is recommended. 4K allows you to crop into the frame in post-production without losing quality. It also gives you the option to export in 1080p for a sharper final image. If you only plan to share on social media, 1080p is sufficient, but 4K gives you more flexibility.
Conclusion
Choosing the right camera for surfing comes down to understanding the environment, not just the specs. Prioritize image stabilization above all else, ensure the camera has native waterproofing or a reliable housing, and think carefully about how you will mount it. Do not get distracted by 8K resolution or 360-degree features that you will rarely use. A mid-range camera with solid stabilization, a swappable battery, and a durable lens cover will serve you better than a flagship model that you are afraid to take out in rough conditions. Rinse your gear after every session, carry a spare battery, and focus on capturing the waves rather than fiddling with settings. With the right camera in hand, you will be ready to document your best rides and relive them for years to come.