
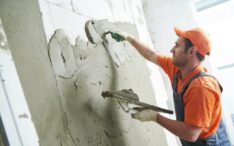
Old plaster and lath walls tell a story. They’re found in historic homes, adding charm and character. But cracks, holes, and wear can make them look tired. Fixing these walls isn’t just about aesthetics—it preserves history. Did you know that over 30% of U.S. homes built before 1940 have plaster walls, according to the U.S. Census Bureau? Many of these need repairs to stay strong. This guide shows you how to fix old plaster and lath walls step by step. Whether you’re tackling a small crack or a big hole, you’ll learn practical techniques to restore your walls.
Why Plaster and Lath Walls Matter
Plaster and lath walls were common before drywall became popular. Builders used wooden laths or expanded metal lathing as a base. Then, they applied lime plaster or gypsum plaster for a smooth finish. These walls are durable but prone to cracks over time. Temperature changes, settling foundations, or moisture cause damage. Repairing them keeps your home’s value and charm intact. Plus, it’s a rewarding DIY job.
Tools and Materials You’ll Need
Before starting, gather the right tools and materials. Having everything ready saves time and frustration. Here’s what you need:
- Plaster repair products: Use Plaster Magic, DAP® Plaster Wall Patch, or UGL Plaster patch.
- Bonding agent: Plaster weld or PVA glue strengthens adhesion.
- Putty knife: A 6-inch or 8-inch blade works best for spreading plaster.
- Flat trowel: Smooths large areas.
- Bucket trowel: Scoops plaster mix.
- Midget trowel: Reaches tight spots.
- Mesh tape: Nylon mesh tape or fiberglass mesh reinforces cracks.
- 220 grit sandpaper: Smooths dried plaster.
- Paint brush: Applies bonding agents or plaster conditioner.
- Microfiber cloth: Cleans dust.
- Sharp sand: Mixes with lime putty for texture.
- Construction adhesive: Secures loose lath.
- Masonry drill bit: Drills into tough plaster.
- Shop vac: Removes debris.
- Digital stud finders: Locates lath behind plaster.
- Plasterboard nails: Secures new plasterboard if needed.
- Adhesive cartridge: For applying construction adhesive.
- Reciprocating saw: Cuts damaged lath or plasterboard.
- Safety gear: Wear gloves, goggles, and a dust mask.
Pro tip: Check Lancaster Limeworks for high-quality lime-based plaster products. They specialize in heritage restoration.
Step-by-Step Guide to Fixing Plaster and Lath Walls
Repairing plaster and lath walls takes patience. Follow these steps for a professional finish.
Step 1: Assess the Damage
Start by checking the wall. Look for cracks, holes, or loose plaster. Tap gently with your hand. Hollow sounds mean loose plaster or lath. Use a digital stud finder to locate wooden laths or timber joists. Mark damaged areas with a pencil. Small cracks need patching plaster. Larger holes may require new lath or plasterboard.
Step 2: Prepare the Area
Clear the room of furniture. Lay down drop cloths. Use a shop vac to remove loose debris. Scrape away flaking plaster with a putty knife. If you find animal hair in old plaster, don’t worry—it’s a traditional binder. Clean the area with a microfiber cloth. Apply a plaster conditioner to stabilize the surface.
Step 3: Secure Loose Lath
Loose lath causes plaster to crack. Check for wobbly wooden laths or galvanised mesh. Use construction adhesive from an adhesive cartridge to secure them. Drill pilot holes with a masonry drill bit. Fasten lath to studs with plasterboard nails. For big gaps, install spare lath or expanded metal lathing. Phoenix Restoration suggests using Plaster Magic for this step.
Step 4: Repair Small Cracks
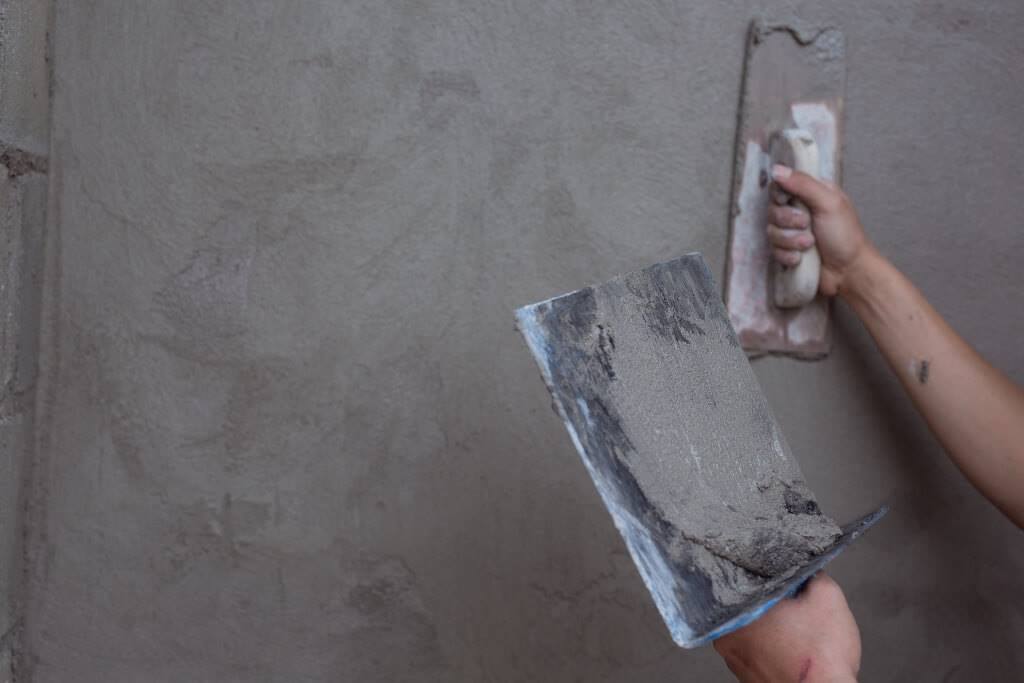
Small plaster cracks are easy to fix. Apply a bonding agent like plaster weld with a paint brush. Let it dry for 10 minutes. Mix patching plaster with water to a creamy consistency. Spread it over cracks with a putty knife. Press nylon mesh tape into the wet plaster. Smooth with a flat trowel. Let it dry for 24 hours. Sand lightly with 220 grit sandpaper.
Step 5: Fix Large Holes
Big holes need more work. Cut away damaged plaster with a reciprocating saw. Create a clean, square edge. If lath is missing, install new expanded metal lathing. Secure it with plasterboard nails. Apply a bonding agent. Mix lime putty or gypsum plaster with sharp sand for texture. Spread a base layer with a bucket trowel. Add mesh tape for strength. Apply a second layer with a flat trowel. Smooth it out. Let it dry for 48 hours. Sand gently.
Step 6: Apply Veneer Plaster for a Smooth Finish
For a polished look, use veneer plaster. Big Wally’s Plaster Magic or setting-type veneer plaster works well. Apply a thin layer with a flat trowel. Spread evenly over the repaired area. Let it cure for 24 hours. Sand with 220 grit sandpaper. Wipe clean with a microfiber cloth. Your wall should look seamless.
Step 7: Prime and Paint
Prime the repaired area with a bonding agent like PVA glue. This helps paint stick. Use a paint brush for small areas or a roller for larger ones. Choose a high-quality interior filler paint. Apply two coats for even coverage. Let each coat dry fully.
Common Mistakes to Avoid
Repairing plaster walls can go wrong if you rush. Avoid these pitfalls:
- Skipping the bonding agent: Without plaster weld or PVA glue, new plaster won’t stick.
- Using drywall compound: It’s not strong enough for plaster walls.
- Ignoring loose lath: Unsecured lath leads to new cracks.
- Applying thick layers: Thin layers dry better and crack less.
- Sanding too soon: Wait 24–48 hours for plaster to cure.
Tips for Success
Want a professional result? Follow these tips:
- Work in small sections to control drying time.
- Mix plaster in small batches to avoid waste.
- Watch YouTube channels like Phoenix Restoration for visual guides.
- Join heritage groups or Stack Exchange Network for advice.
- Use lime-based plaster for authentic repairs in old homes.
Some damage is too big for a DIY job. If you see large cracks, bulging walls, or water damage, hire a pro. They have tools like digital stud finders and expertise in lime plaster. Check Q&A communities like Stack Overflow for trusted referrals. Discover Oklahoma City Sustainability in Roofing Services.
FAQs
What is the best product for plaster wall repair?
Plaster Magic and DAP® Plaster Wall Patch work well. They bond strongly and dry smoothly.
Can I use drywall screws for lath and plaster walls?
Yes, but plasterboard nails are better. They grip wood lath without cracking plaster.
How long does plaster repair take to dry?
Small patches dry in 24 hours. Large repairs need 48 hours to cure fully.
Is lime plaster better than gypsum plaster?
Lime plaster breathes better, ideal for old homes. Gypsum plaster sets faster but traps moisture.
Can I repair plaster walls myself?
Yes, with the right tools and patience. Use Plaster Magic or UGL Plaster patch for best results.
Conclusion
Fixing old plaster and lath walls restores your home’s beauty. Assess damage, gather tools, and follow the steps. Use bonding agents and mesh tape for strong repairs. Avoid common mistakes like skipping prep work. With care, your walls will look new. Ready to start? Grab your putty knife and get to work!
Share your repair tips in the comments or join a heritage group for more advice.
References:
- U.S. Census Bureau: https://www.census.gov
- Phoenix Restoration YouTube: https://www.youtube.com
- Lancaster Limeworks: https://www.lancasterlimeworks.com
- Stack Exchange Network: https://stackexchange.com