

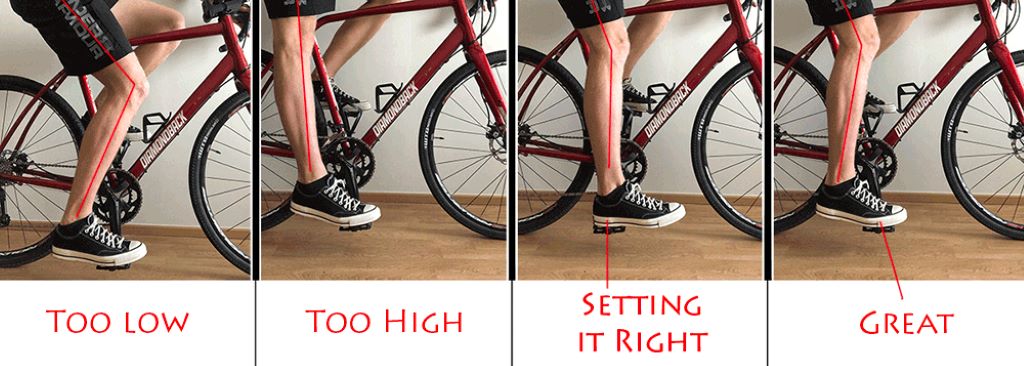
If you’ve ever felt discomfort while cycling, chances are your saddle height needs adjustment. Your leg should be nearly fully extended at the bottom of each pedal stroke. Set too low, and your knees will ache. Too high, and your hips will rock. Dialing in the right saddle height is crucial for efficiency and injury prevention. Let’s explore how to determine your perfect saddle height.
Why Saddle Height Matters
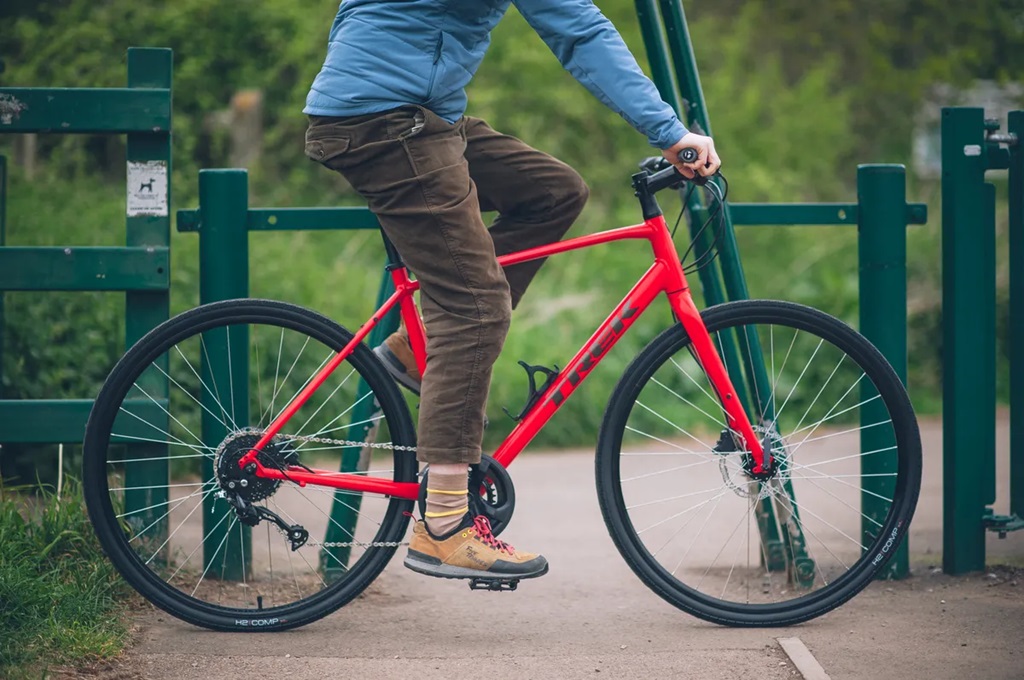
Your cycling saddle supports your body weight and transmits power to the pedals. Proper saddle height allows you to pedal efficiently without straining muscles or joints. If the height is off, you may experience:
- Knee pain from overextension or excessive flexion
- Hip, lower back, or foot pain from rocking hips
- Less power transfer and endurance
- Numbness or tingling from extreme pressure
- Chafing and friction from sliding forward or back
Setting your saddle height seems simple, but small changes make a big difference. Even a centimeter too high or low can lead to pain and poor performance. Finding your optimal saddle height takes some trial and error. It’s worth the effort for happy knees and faster riding. In addition to adjusting saddle height, investing in the most comfortable bike seat can enhance the overall riding experience for women.
How to Determine Saddle Height
Many methods exist for gauging initial saddle height, but fine-tuning based on comfort and efficiency is critical. Here are some popular starting points:
Knee Angle Method
This technique sets your saddle height based on knee angle with the pedal at the bottom dead center. Aim for 25-30 degrees of bend for optimal efficiency.
To measure:
- Sit on the bike with one pedal at the 6 o’clock position.
- Place your heel on the pedal to straighten your leg.
- Use a goniometer at the knee crease to measure the angle.
- Adjust saddle height until you hit 25-30 degrees of flexion.
LeMond Method
Named for cycling great Greg LeMond, this method uses knee angle to set saddle height. The steps are:
- Measure your inseam without shoes in centimeters from crotch to floor.
- Multiply your inseam length by 0.883. This gives saddle height from the bottom bracket’s center to the saddle’s top along the seat tube.
- Make adjustments in 1cm increments based on comfort.
This quick calculation gets you in the ballpark to start test riding.
109% Method
Some bike fitters recommend setting your saddle height at 109% of your inseam length. For example, if your barefoot inseam measures 80cm, your saddle height would be 87cm (80 x 1.09 = 87). This also provides an initial height for test rides.
Thomas Method
Another technique calls for adjusting saddle height with your heel on the pedal at 6 o’clock. In this position:
- Your leg should be fully extended at hip level.
- There should be no rocking at the hips.
- Make minor adjustments until finding the “sweet spot.”
Dialing In Your Perfect Saddle Height
Starting with one of the above methods sets you on the right path. However, you’ll need test rides and tweaks to find the ideal saddle height for your body and riding style.
Start Low
Begin at the low end of the recommended height range. It’s easier on the knees to start too low versus too high. Gradually raise the saddle 5-10mm to avoid overstressing your joints.
Pedal Stroke Check
Focus on your pedal stroke during test rides. At the bottom of each downstroke:
- Your knee should almost fully extend but not hyperextend.
- Your hips should stay still without rocking.
- You should feel a slight bend in the knee nearing full extension.
Joint Comfort
Listen to your body. Any knee, hip, or back discomfort means your saddle needs adjusting. Knee pain typically means your saddle is too high. Hip, lower back, or foot pain can signal it’s too low.
Efficiency Check
A properly fitted saddle height lets you pedal smoothly and powerfully. If your stroke feels choppy or difficult, you likely need adjustment. Raising the saddle slightly can provide more leg extension for increased efficiency.
Saddle Setback
Check saddle setback (fore/aft position) as you dial in saddle height. Your kneecap should be over the pedal spindle with the crank arm parallel to the seat tube. Adjust setbacks in small increments.
Crank Length Matters
Standard crank arm lengths range from 165 to 180mm. The right length depends on inseam, saddle height, riding style, and joint flexibility. This affects how you set saddle height. Work with your bike fitter to determine the optimal crank arm length.
Other Considerations for Adjusting Saddle Height
Along with your body measurements and riding, a few other factors impact saddle height:
Cycling Discipline
Your optimal saddle height can vary slightly based on your riding type. For example, mountain bikers often set their saddles 10-20mm lower than road cyclists for better maneuverability. Time trialists sometimes raise saddles to 5mm higher than the standard road position for maximal power. Consider your primary cycling discipline as you fine-tune height.
Flexibility & Strength
Everyone has slightly different mobility and capability. Regular stretching and strength training allows a higher saddle height without strain. Inflexible hips may require a lower saddle. Strong core muscles help stabilize the lower back. Work on flexibility and strength training to enable your ideal saddle height.
Bike Frame Size
Bike frame size influences saddle height limits. Smaller frames have less seatpost length for adjusting height. Similarly, frames with sloping top tubes can restrict how high you can raise the saddle. Check your bike specs and talk with your fitter to ensure your frame accommodates proper saddle height.
Shoes and Cleats
Wear cycling shoes that match your cleat setup for saddle height adjustment. The shoe-cleat stack height under the foot effectively lowers your leg extension. Road shoes with cleats provide around 10mm of lift. Mountain bike shoes with recessed cleats add 4-5mm. Account for your shoe-cleat system when fine-tuning saddle height.
Saddle Design
Some performance saddles have extra thick, padded tops. This effectively raises you higher than a classic flat saddle profile. Consider if your saddle adds height when setting the seatpost position. You may need to lower the saddle slightly to compensate for a thick top.
Saddle Height Limits
Don’t get carried away chasing the perfect saddle height. Joint strains and reduced power can result from exceeding the ideal range of motion. Respect biomechanical limitations and avoid extreme saddle heights. Target 25-35 degrees knee flexion for joint-friendly efficiency.
Maintaining Proper Saddle Height
Dialing in your perfect saddle position takes effort upfront. But don’t neglect it once set. Regularly check for proper leg extension and make slight adjustments as needed.
Periodic Reviews
Reassess your saddle height every few months – especially at the start of a new training cycle. Changes in flexibility, strength, and cycling discipline may require tweaks. Growing kids need frequent saddle adjustments. Consistently review height relative to your body measurements and riding style.
Mark Your Seatpost
Once your saddle height is optimized, mark the seatpost height with tape or nail polish. This gives you a quick visual reference when checking position. Mark the seat angle as well in case the saddle gets bumped. Strive to maintain ideal height at all times.
Retighten Hardware
The seat post and saddle clamp bolts can loosen over time, allowing the saddle to slip. Frequently check and tighten hardware to prevent unintentional changes in position. A drop of blue Loctite on fasteners also helps secure your perfect saddle height long-term.
Address Pain Promptly
Knee pain, hip discomfort, or soreness elsewhere can indicate your saddle needs attention. Address fit issues promptly before minor problems become injuries. Be willing to tweak saddle height at the first sign of trouble. Don’t simply push through pain and hope it resolves itself later.
Takeaway Tips
Finding your optimal saddle height takes some trial and error. But proper leg extension promotes efficiency and keeps your joints happy. Some key takeaways include:
- Start with a recognized fitting method to estimate the initial saddle height
- Raise the saddle gradually during test rides to avoid overstress
- Focus on pedal stroke, joint comfort, and efficiency while adjusting
- Consider cycling discipline, flexibility, frame size, and equipment
- Mark your seatpost and tighten bolts to maintain position
- Reassess periodically and fix pain issues before they worsen
You can ride more substantially and comfortably with the right saddle height. Take the time to fit yourself and enjoy cycling at its best properly!
Frequently Asked Questions
What is a good rule of thumb for setting saddle height?
A simple starting point is to set your saddle height between 25-35 degrees of knee flexion with the pedal at the bottom dead center and your heel on the pedal.
How do I know if my saddle is too high or too low?
If your saddle is too high, you may experience knee pain, excessive rocking of the hips, or feel like you are reaching for the pedals. If it’s too low, you can have knee pain from over-flexion, sore feet from pointing toes, or feel like you are pedaling downhill. Pay attention to any joint discomfort as a sign of improper saddle height.
Should I lower my saddle for climbing?
It’s a common myth that you should lower your saddle for climbing. In most cases, you want to maintain the same optimal saddle height, whether climbing, descending, or flat terrain. Lowering the saddle can put excessive strain on the knees. The only exception might be very steep grades where you are standing most of the time.
Can saddle height cause numbness or genital numbness?
Yes, if the saddle height is too high, it can increase pressure in the perineal area and cause genital numbness or erectile dysfunction. Ensure your saddle isn’t so high that it forces you to slide forward on the nose, reducing blood flow constantly.
Will a professional bike fit guarantee my saddle height is perfect?
Not necessarily. Even with an expert bike fit, you may need to make minor tweaks to saddle height based on how your body feels over multiple rides. The professional fit gets you in the ballpark, but expect to experiment within a centimeter or two to dial it in.
Should I lower my saddle as I get older?
As we age, flexibility often decreases, so a slightly lower saddle taking pressure off the hips and back may be more comfortable. But don’t go overboard. Aim to maintain as much leg extension as your body allows for efficiency. Dropping your saddle too much can strain the knees. Go for the highest height you can without discomfort.
Conclusion
Setting your saddle at the optimal height is a crucial bike fit skill every cyclist should master. Take the time to dial in your perfect position gradually gradually. The zen of BMX: lightweight bikes for a smooth, effortless ride emphasizes how minor tweaks can majorly boost power transfer and comfort, ensuring that proper leg extension reduces strain, allowing riders to journey faster and further with ease and a joyful smile.