How Do You Use Wire Rope Crimps

The Zen of BMX: Lightweight Bikes for a Smooth, Effortless Ride
September 25, 2023
Six tips when packing a parcel
September 27, 2023Hey there, DIY enthusiasts and handy folks! Today, we’re diving into the world of wire rope crimps. If you’re new to this, don’t worry – we’ve got your back. Imagine wire rope crimps as the trusty handshake that holds your wire ropes together securely. They may look small, but they play a mighty role in ensuring safety and stability. So, grab your tool belt and join us as we explore how to use wire rope crimps like a pro.
Table of Contents
ToggleGetting to Know Wire Rope Crimps
Before we jump into the “how,” let’s spend a moment on the “what.” Wire rope crimps, also known as metal rope clamp is small metal fittings designed to secure the ends of wire ropes. They come in various shapes and sizes, but their primary function is to create a strong connection point in wire rope assemblies.
Tools You’ll Need
To start your wire rope crimping adventure, you’ll need a few tools and materials. Here’s what you should gather:
- Wire Rope: This is your core material, the strong cable or wire you want to secure.
- Wire Rope Crimps: Of course, you’ll need these little heroes. They typically come in aluminum or copper.
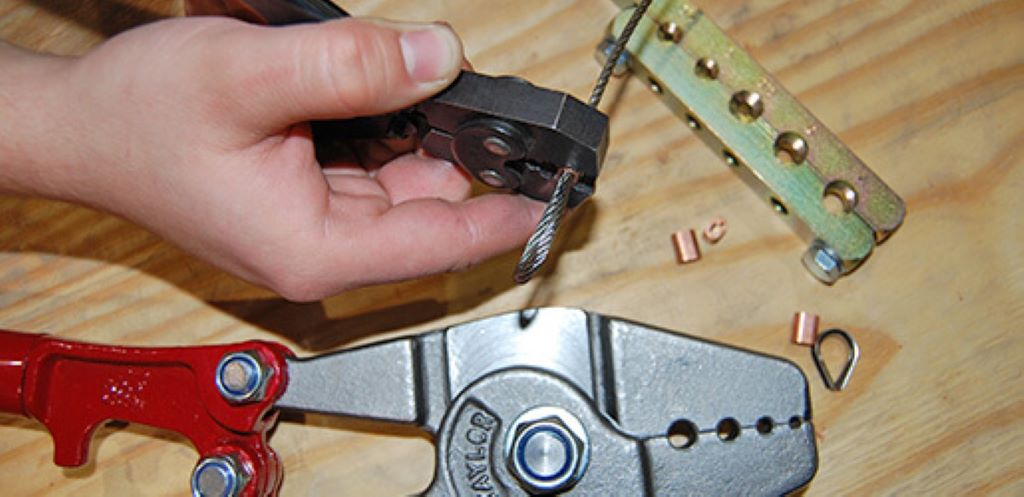
- Crimping Tool: A specialized crimping tool is essential for this job. Don’t try to improvise with pliers or other tools; they won’t give you the secure connection you need.
- Measuring Tape: Precision is key in any DIY project, and measuring tape ensures your wire rope is cut to the right length.
- Wire Cutter: You’ll need this to trim your wire rope to the desired size.
- Safety Gear: Safety first! Grab some gloves and safety glasses to protect your hands and eyes.
Now that you’ve got your toolkit ready, let’s dive into the process step by step.
Step 1: Measure and Cut
- Measure Twice: As the old saying goes, measure twice, cut once. Use your measuring tape to determine the length of wire rope you need. Make sure to add a little extra for any potential mistakes.
- Cut Carefully: With your wire cutter, trim the wire rope to the desired length, following your measurements precisely. Keep your fingers away from the cutting edge!
Step 2: Insert the Wire Rope Crimp
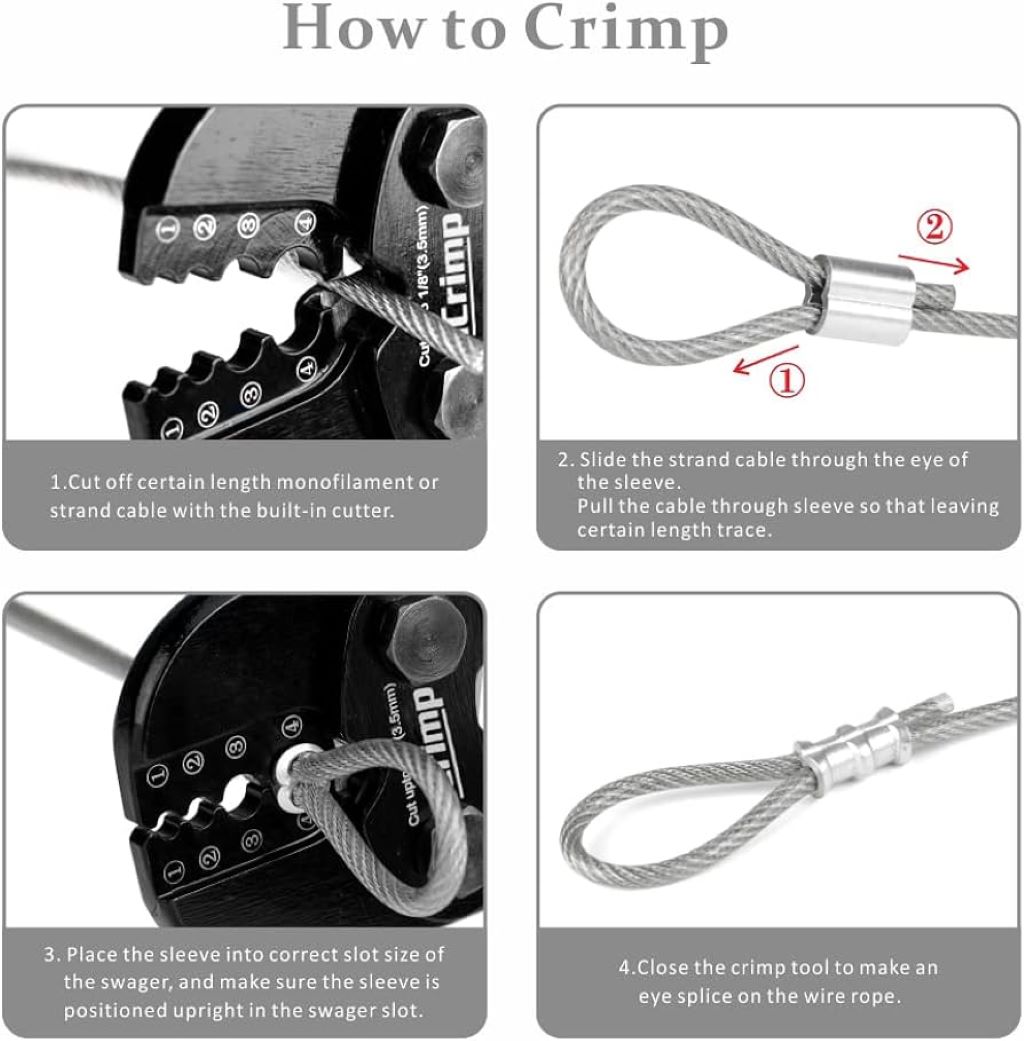
- Slide It On: Take your wire rope crimp and slide it onto one end of the wire rope. Make sure it goes all the way down to where you want to create the connection.
- Position It Right: Ensure the wire rope is fully seated inside the crimp. It should snugly fit without any excess wire sticking out.
Step 3: Crimping Time
- Crimp Placement: Place the wire rope with the crimp inside the jaws of your crimping tool. Position it so that the crimp is centered within the tool’s jaws.
- Squeeze Firmly: Now, here comes the fun part! Squeeze the handles of the crimping tool firmly and evenly. You want to exert enough pressure to create a secure connection, but not so much that you deform or damage the crimp.
- Inspect Your Work: After crimping, take a close look at the crimped section. It should appear compressed and snug around the wire rope. If it looks uneven or distorted, you may need to recrimp it.
Step 4: Repeat for the Other End
- Duplicate the Process: With one end of the wire rope secured, repeat the same steps for the other end. Measure, cut, slide on the crimp, and crimp it securely.
Step 5: Safety Checks
- Visual Inspection: Give your newly crimped wire rope assembly a thorough visual inspection. Check both crimps for uniformity and tightness. Ensure there are no sharp edges or deformities.
- Load Testing: If your application involves significant weight-bearing, consider performing a load test to ensure the crimps can handle the intended load. This involves applying a controlled load to the assembly and checking for any signs of weakness or failure.
Step 6: Put it to Use
- Incorporate Into Your Project: With your wire rope securely crimped at both ends, you’re ready to incorporate it into your project. Whether it’s for a suspension bridge, a hanging plant pot, or any other application, rest easy knowing your wire rope is held together by reliable crimps.
Congratulations, you’ve successfully mastered the art of using wire rope crimps! But before you dive into your projects, let’s tackle some frequently asked questions, starting with how to update the front of your property for a stunning transformation.
FAQs
Q1: Can I use pliers instead of a crimping tool for wire rope crimps?
A1: We strongly recommend using a dedicated crimping tool for wire rope crimps. Pliers may not provide the required pressure and precision, potentially leading to an insecure connection. Safety and reliability should always come first.
Q2: Can I reuse wire rope crimps if I make a mistake?
A2: It’s not advisable to reuse wire rope crimps, as they are designed for single-use applications. Once crimped, they may not provide the same level of security if opened and recrimped.
Q3: Are there different types of wire rope crimps for different applications?
A3: Yes, wire rope crimps come in various styles and materials to suit different applications. Be sure to choose crimps that match your specific project’s requirements, such as material strength and cable size.
Q4: How do I know if I’ve crimped the wire rope correctly?
A4: A properly crimped wire rope should appear compressed and snug around the wire. There should be no visible gaps, and the crimp should be evenly shaped. If it looks uneven or distorted, it’s a sign that you may need to recrimp.
Q5: Can I crimp wire ropes of different materials together?
A5: Crimping wire ropes of different materials, such as steel and aluminum, is generally not recommended. The varying material properties can lead to corrosion and reduced strength over time. Stick to crimping wires of the same material for the best results.


