How to Make Body Butter Using Herbal Oil Infusions at Home

Best 18V Impact Drivers in 2025: Including Makita XDT19Z
December 29, 2025
VEVOR Electric Pasta Maker Review: Quick And Easy Homemade Pasta
January 5, 2026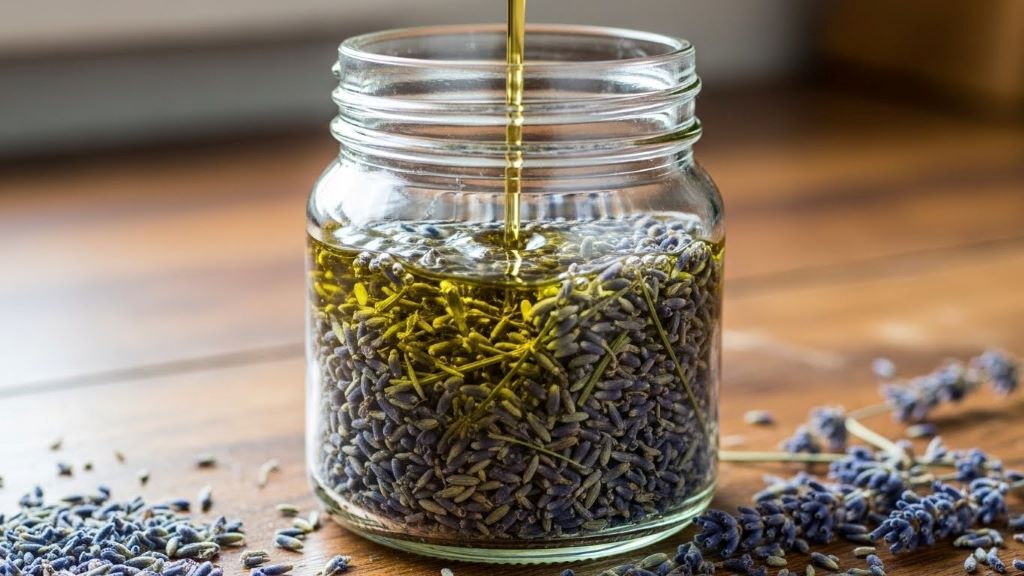
Creating your own body butter with herbal oil infusions is a rewarding and cost-effective way to nourish your skin naturally. This luxurious skincare product combines the moisturizing properties of butters and oils with the therapeutic benefits of herbs. Moreover, homemade body butter allows you to control every ingredient that touches your skin.
In this comprehensive guide, you will learn how to make rich, creamy body butter using herbal oil infusions. Additionally, we will explore the best herbs to use, essential preparation techniques, and storage tips to keep your creation fresh.
Understanding Herbal Oil Infusions
Herbal oil infusions are created by steeping herbs in carrier oils to extract their beneficial properties. This process transfers vitamins, antioxidants, and healing compounds from the plant material into the oil. Therefore, the resulting infused oil becomes a powerful base for skincare products.
The infusion process can take anywhere from a few hours to several weeks, depending on your chosen method. However, patience during this stage ensures a more potent final product. The herbs release their therapeutic compounds gradually, creating an oil rich in skin-loving nutrients.
Popular herbs for oil infusions include calendula for soothing irritated skin, lavender for relaxation and healing, chamomile for calming inflammation, and rosemary for circulation. Each herb brings unique benefits to your body butter recipe.
Choosing Your Base Ingredients
The foundation of excellent body butter consists of three main components: butter, oil, and optional essential oils. Your choice of ingredients determines the texture, absorption rate, and therapeutic benefits of the final product.
For butters, shea butter remains the most popular choice due to its rich, creamy texture and high vitamin content. Alternatively, cocoa butter provides a firmer consistency and a subtle chocolate aroma. Mango butter offers a lighter option that absorbs quickly into the skin.
Carrier oils for herbal infusions should be stable and nourishing. Sweet almond oil, jojoba oil, and olive oil work exceptionally well. According to the National Center for Complementary and Integrative Health, many botanical oils have been used traditionally for skin health and continue to be studied for their therapeutic properties.
Making Your Herbal Oil Infusion
Creating a herbal oil infusion requires just two ingredients: dried herbs and carrier oil. Fresh herbs contain water that can cause the oil to spoil, so always use thoroughly dried plant material.
Start by filling a clean, dry glass jar about halfway with your chosen dried herbs. Next, pour your carrier oil over the herbs until they are completely submerged with an extra inch of oil on top. This prevents the herbs from being exposed to air, which could lead to mold growth.
For the quick method, place the sealed jar in a sunny windowsill for two to three weeks. Shake the jar gently every few days to redistribute the herbs. Alternatively, use the heat method by placing the jar in a slow cooker filled with water on the lowest setting for four to six hours.
Once your infusion is ready, strain the oil through cheesecloth or a fine-mesh strainer. Squeeze the cloth to extract every drop of precious infused oil. Furthermore, store the strained oil in a dark glass bottle away from direct sunlight.
Essential Equipment and Supplies
Gathering the right tools before you begin makes the process smooth and enjoyable. You will need a double boiler or a heatproof bowl set over a pot of simmering water. This gentle heating method prevents your ingredients from burning.
Additionally, prepare a hand mixer or stand mixer for whipping the body butter. A sturdy spatula helps scrape down the sides of your mixing bowl. Clean glass jars or containers with tight-fitting lids are essential for storage.
Measuring cups and spoons ensure accurate proportions in your recipe. A kitchen thermometer helps monitor temperatures if you want to be precise. However, body butter making is forgiving, and exact temperatures are not critical.
The Basic Body Butter Recipe
This simple recipe creates approximately eight ounces of luxurious body butter. You can easily double or triple the quantities for larger batches.
Combine half a cup of shea butter with a quarter cup of your herbal-infused oil in your double boiler. Add two tablespoons of coconut oil for extra moisturizing power. Gently melt these ingredients together over low heat, stirring occasionally.
Once fully melted, remove the mixture from heat and let it cool at room temperature for about thirty minutes. The mixture should start to solidify around the edges but remain soft in the center. This partially solidified state is perfect for whipping.
Transfer the mixture to a mixing bowl and place it in the refrigerator for ten to fifteen minutes. The mixture should firm up but not become completely solid. Subsequently, use your hand mixer to whip the butter on medium-high speed for five to seven minutes.
The texture will transform from dense and oily to light, fluffy, and creamy. If desired, add ten to fifteen drops of essential oils during the last minute of whipping. Popular choices include lavender, peppermint, or tea tree oil.
Customizing Your Body Butter
Personalization makes your body butter uniquely suited to your skin needs. For dry or mature skin, increase the proportion of shea butter and add vitamin E oil. Consequently, your body butter will provide intense hydration and antioxidant protection.
If you prefer a lighter texture that absorbs quickly, reduce the amount of butter and increase the infused oil ratio. Adding a small amount of arrowroot powder creates a less greasy feel. However, use this sparingly as too much can make the texture chalky.
For seasonal variations, create a summer blend with lighter oils and refreshing essential oils like citrus or mint. Winter blends benefit from richer butters and warming essential oils such as cinnamon or vanilla. Therefore, you can have different body butters for different times of year.

Proper Storage and Shelf Life
Storing your body butter correctly ensures it remains fresh and effective for months. Always use clean, dry containers to prevent bacterial contamination. Glass jars work better than plastic because they do not absorb oils or odors.
Keep your body butter in a cool, dark place away from direct sunlight and heat sources. According to skincare experts at WebMD, natural products without synthetic preservatives typically last three to six months when stored properly.
The texture of body butter can change with temperature fluctuations. If it melts during hot weather, simply place it in the refrigerator until it solidifies, then re-whip if needed. Additionally, always use clean hands or a small spatula when scooping out product to prevent introducing bacteria.
Watch for signs of spoilage such as off odors, color changes, or mold growth. If you notice any of these signs, discard the product immediately. Adding vitamin E oil or rosemary oleoresin extract can extend shelf life naturally.
Application Tips and Benefits
Apply your homemade body butter to slightly damp skin after bathing for maximum absorption. The water helps seal in moisture while the oils penetrate deeply. A little goes a long way, so start with a small amount and add more if needed.
Focus on dry areas such as elbows, knees, and feet where skin tends to be rougher. The rich texture makes this body butter particularly effective for these problem areas. Moreover, the herbal infusions provide additional therapeutic benefits beyond simple moisturization.
Regular use of herbal-infused body butter can improve skin texture, reduce inflammation, and provide antioxidant protection. Many users notice softer, more supple skin within just a few days of consistent application. Therefore, making your own body butter becomes both a skincare ritual and a form of self-care.
Troubleshooting Common Issues
Sometimes body butter does not turn out exactly as expected, but most issues are easy to fix. If your body butter is too soft and does not hold its shape, place it back in the refrigerator for thirty minutes, then re-whip it. Adding a bit more solid butter before re-whipping can also help.
Conversely, if your body butter is too hard or grainy, it may have been exposed to temperature fluctuations during cooling. Gently remelt the mixture completely, let it cool slowly at room temperature, and whip again. This process usually restores the smooth, creamy texture.
A greasy feeling on the skin typically means you have used too much product or need to adjust your oil-to-butter ratio. Experiment with different proportions until you find your perfect balance. Additionally, allowing the body butter to absorb fully before getting dressed prevents transfer to clothing.
Conclusion
Making body butter using herbal oil infusions at home is a simple yet rewarding process that results in a luxurious, all-natural skincare product. By following this guide, you can create customized body butter tailored to your skin’s specific needs while enjoying the therapeutic benefits of herbs.
The key steps include preparing quality herbal oil infusions, selecting the right combination of butters and oils, and whipping the mixture to achieve that perfect creamy texture. Furthermore, proper storage ensures your creation remains fresh and effective for months.
With practice, you will develop your own favorite recipes and techniques. Therefore, start with this basic recipe and experiment with different herbs, butters, and essential oils to discover what works best for your skin.
Frequently Asked Questions
Can I use fresh herbs instead of dried herbs for oil infusions?
Fresh herbs contain water content that can cause your oil infusion to develop mold and spoil quickly. Always use completely dried herbs to ensure the longevity and safety of your infused oils. If you grow your own herbs, dry them thoroughly for at least one to two weeks before using them in oil infusions.
How long does homemade body butter last?
When stored properly in a cool, dark place using clean containers, homemade body butter typically lasts three to six months. Adding natural preservatives like vitamin E oil can extend this period slightly. Always watch for changes in smell, color, or texture that indicate spoilage.
Why did my body butter become grainy?
Graininess occurs when shea butter is heated and cooled too quickly or exposed to temperature fluctuations. To fix this, gently remelt the entire batch, allow it to cool slowly at room temperature without refrigeration, and then whip it again once it reaches the proper consistency.
Can I substitute coconut oil for other oils in the recipe?
Yes, you can substitute coconut oil with other solid oils like palm oil or babassu oil. However, keep in mind that each oil has different melting points and properties. Coconut oil adds firmness and a light tropical scent, so your substitution may slightly change the final texture and aroma.
Is body butter suitable for all skin types?
Body butter is generally suitable for most skin types, especially dry or normal skin. However, people with very oily or acne-prone skin may find body butter too heavy for facial use. For these skin types, use body butter on the body only and choose lighter, non-comedogenic moisturizers for the face.
Related Topics:


