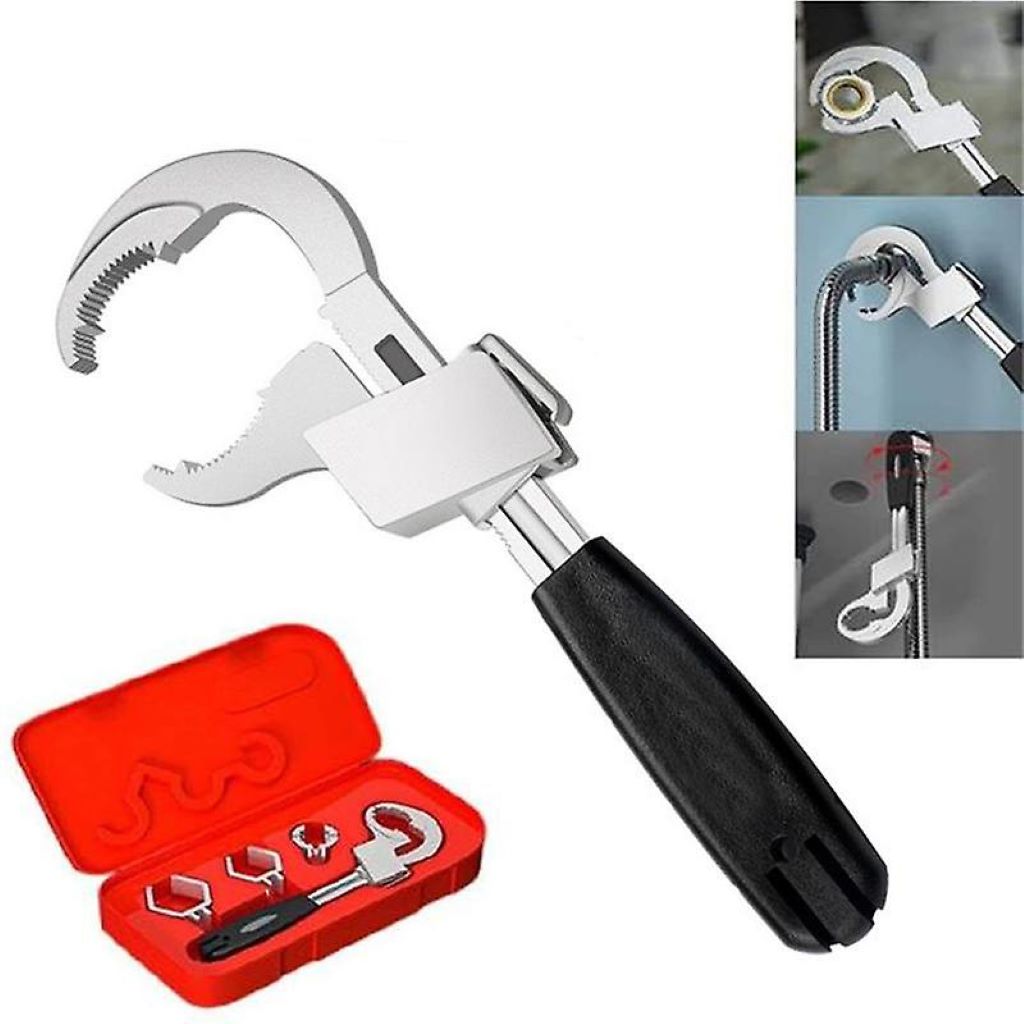
Wrestling with a Stubborn Showerhead? The Right Wrench for the Job

That Rotten Egg Smell: Why Your Drain Smells Like a Sewer (And How to Fix It)
November 2, 2024
Wheels of Freedom: When Do Kids Start Riding Bikes?
November 4, 2024
We’ve all been there: standing in a dribbling shower, frustrated that the once-powerful stream has been reduced to a pathetic trickle. The solution? A new showerhead! But before you can enjoy that luxurious rainfall experience, you need to remove the old one. And that often means wrestling with a stubborn, corroded, stubborn showerhead fixture. For more tips on how to tackle bathroom upgrades, you might want to explore Rusticdecorliving blog, where you’ll find advice on everything from shower head replacements to enhancing the overall look of your bathroom.
Fear not, DIY warriors! This guide will equip you with the knowledge to choose the right wrench for the job, ensuring a smooth and successful showerhead swap.
Understanding the Challenge
Shower heads are typically connected to the shower arm with a threaded fitting. Over time, this connection can become seized due to mineral deposits, corrosion, and over-tightening. Using brute force with the wrong tool can damage the fixture, the shower arm, or even the pipes, leading to costly repairs. When facing plumbing repairs, it’s essential to choose the right fittings, such as understanding when to use wye vs tee connections, to ensure efficient water flow and reduce stress on the plumbing system.
The Wrench Arsenal
Before you delve into your toolbox, it’s important to understand the different types of wrenches that might come in handy:
- Adjustable Wrench: This versatile tool, also known as a crescent wrench, can be adjusted to fit various nut and bolt sizes. It’s a good starting point for shower heads, but its jaws can slip if not positioned correctly, potentially damaging the fixture’s finish.
- Open-End Wrench: These wrenches have fixed, open jaws designed to fit specific hex nut sizes. While they offer a more secure grip than adjustable wrenches, you’ll need to know the exact size of your shower head fitting.
- Socket Wrench: A socket wrench uses interchangeable sockets to fit different nut sizes. They provide excellent leverage and grip, making them ideal for stubborn shower heads.
- Basin Wrench: This specialized tool features a long shaft and a swiveling jaw, designed to reach into tight spaces like those found behind a sink or shower head. While incredibly useful for plumbing, it might be overkill for a simple shower head removal.
- Strap Wrench: If your shower head has a decorative finish that you don’t want to mar, a strap wrench is your best friend. It uses a rubber or fabric strap to grip the fixture, preventing scratches or damage.
Choosing Your Weapon
Now that you’re familiar with the tools, let’s determine the best wrench for your specific needs:
- Assess the Situation:
- Size: Most shower heads have a standard 1/2-inch fitting, but some might be larger or smaller. If possible, visually inspect the fitting to estimate its size.
- Accessibility: Is the shower head easily accessible, or is it in a tight spot?
- Finish: Are you concerned about scratching a decorative finish?
- Select the Right Wrench:
- For standard, accessible shower heads with no delicate finish: An adjustable wrench or an open-end wrench (if you know the size) will usually suffice.
- For stubborn shower heads or those in tight spaces: A socket wrench or a basin wrench will provide the necessary leverage and access.
- For shower heads with decorative finishes: A strap wrench will protect the finish while offering a secure grip.
Tips for Success
- Protect the Finish: Before using any wrench, consider applying masking tape to the shower head to prevent scratches.
- Penetrating Oil: If the shower head is stuck, apply a penetrating oil like WD-40 to the threads and let it sit for a few minutes. This will help loosen the connection.
- Leverage and Support: Use a long-handled wrench for better leverage. If possible, support the shower arm with your other hand to prevent it from twisting or bending.
- Turn Counterclockwise: Remember, “righty-tighty, lefty-loosey.” Turn the wrench counterclockwise to loosen the shower head.
- Don’t Overtighten: When installing the new shower head, hand-tighten it first, then use the wrench to give it another quarter to half turn. Overtightening can damage the threads and make it difficult to remove in the future.
Beyond the Wrench
Sometimes, even the right wrench isn’t enough. If you’re still struggling to remove the shower head, consider these additional tips:
- Heat: Apply heat to the connection with a hairdryer. This can help expand the metal and break the bond caused by corrosion.
- Vinegar: Soak a rag in vinegar and wrap it around the shower head fitting. The acidity of the vinegar can help dissolve mineral deposits.
- Professional Help: If all else fails, don’t hesitate to call a plumber. They have the experience and tools to handle even the most stubborn shower heads.
People Also Enjoyed: How to Start with Timber Framing
Conclusion
Removing a shower head might seem like a daunting task, but with the right wrench and a little know-how, it can be a quick and easy DIY project. By understanding the different types of wrenches and following the tips outlined in this guide, you’ll be well on your way to enjoying that invigorating shower experience in no time!